.svg)
.svg)


In the first part of the article series, Understanding Windows PowerShell, we already discussed the possibilities of scripts.
Scripts allow you to automate tasks in PowerShell. Not only Microsoft systems such as Windows Server, Windows Workstations, Exchange, SQL, or SharePoint can be automated. Many third-party vendors also rely on PowerShell to manage their server services. Tools like ScriptRunner enhance the given possibilities even further: with the ScriptRunner Web Service Connector, for instance, you can easily automate 3rd party systems using their REST APIs.
But before we dive into PowerShell automation, we need one thing: PowerShell scripts. In the following, we go into more detail on how to create or where to find them and what possibilities arise with scripts in the PowerShell.
Download finished scripts
There are many scripts on the Internet that are based on PowerShell and have different uses. Microsoft offers many free scripts on the Script Resources for IT Professionals web page that you can download, use, or add to. Make sure the script is as up-to-date as possible and has a good rating. The download page also shows which operating systems the script has been released for. The license conditions of the scripts are also displayed when downloading.
This is what you need to know about PowerShell scripts
PowerShell scripts can make extensive customizations to systems. So before you run the script, you should look at it and make sure it does not perform any actions you dont want. In PowerShell scripts, you can use other commands, such as the command prompt, in addition to the PowerShell commands (cmdlets). Third-party tools can also be used in PowerShell scripts.
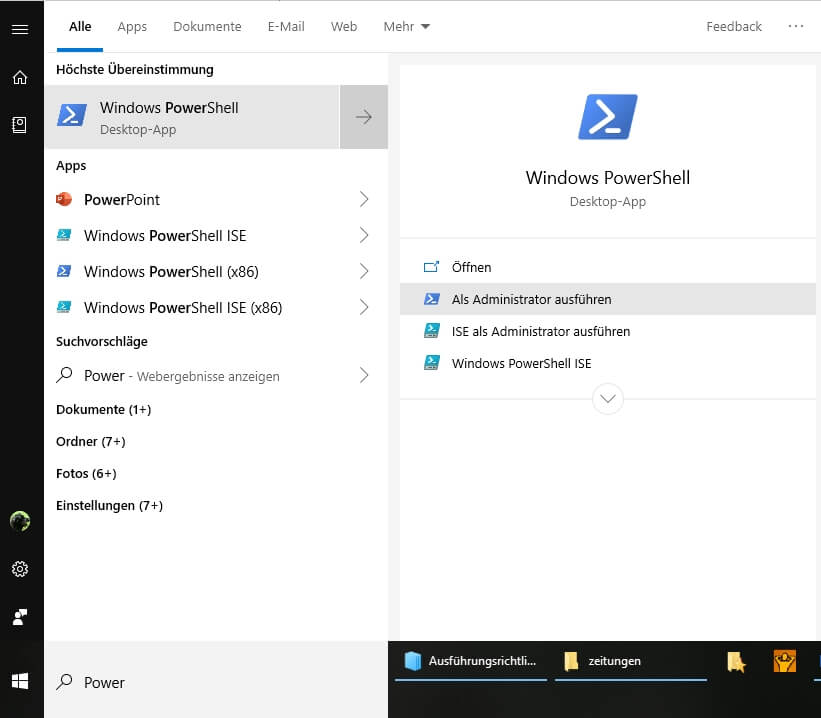
Good PowerShell scripts should be digitally signed so that the execution policy (see the first part of this article) does not block them. In an emergency, you can turn off the PowerShell execution policy. This will cause unsigned scripts to run, but your system will no longer be protected. However, the execution policy is not full protection. The ExecutionPolicy protects the system from accidentally starting a script. The ExecutionPolicy is therefore not a comprehensive security feature. Disabling the policy requires PowerShell to be started from the administrative context menu (Fig. 1).
Use the following command to turn off the execution policy:
Set-ExecutionPolicy Unrestricted
We have already discussed the various options in the first article of the series. For scripts from the Internet you should make sure that they come from a reputable source. In addition, the script should contain comments about the actions to be performed. At the beginning of a script, there should be information about who created the script, what it does, and what users should know about it (as shown in Fig. 2).

In general, it makes sense for comments within scripts to indicate what actions follow in the script and whether users may need to edit something in the script.
Launch scripts
To start a script, it is first downloaded to a directory on the computer. Then the script is called via its *.ps1 file. Many scripts still need different parameters for the start. You should be informed about this either at the beginning of the script, or in the help the options should be documented. If you are in the directory in which the script is stored, you must start the script after the syntax .skript.ps1.
Creating scripts yourself
If you want to create scripts yourself, you should use a suitable editor. Examples are the Windows PowerShell Integrated Scripting Environment (ISE), which is part of Windows, Microsoft Visual Studio Code, the open source editor from Microsoft, or the open source solution Notepad++.
Learning to create scripts
In order to learn how to use PowerShell scripts, it is not absolutely necessary to book courses. There are several sites on the Internet that will help you learn with PowerShell. YouTube videos also help you to learn PowerShell. Well-known examples are:
ISEStereoids Extension for Windows PowerShell ISE
ISESteroids uses Windows PowerShell ISE to edit scripts, but extends it. To use it, you only need to load the extension with Start-Steroids. It is a PowerShell module, not an additional application that replaces the PowerShell ISE.
Idera PowerShell Plus Free Editor
The free PowerShell Plus editor from Idera provides a development environment for PowerShell scripts. The application includes ready-made script parts that you can include in your scripts. In general, the functionality of Idera PowerShell Plus is similar to that of PowerShell ISE, plus the ability to create scripts from templates. After installation, start the application. If you receive a rights error, start the application via the context menu with administrator rights.
After startup, a wizard appears to help you set up the editor. For example, during setup you can control the execution policy for scripts and see the current state. You can also connect SQL Servers to the Editor to run PowerShell scripts directly for SQL Servers. You can then begin editing scripts.
Using Visual Studio Code with PowerShell
We have already mentioned Microsoft Visual Studio code in the previous sections. With the free development environment, you can not only work with programming languages, but also download PowerShell scripts and develop your own scripts.

Visual Studio Code (VSCode) allows you to develop cross-platform apps and applications. With Windows, Linux and macOS X the most important platforms are supported. Microsoft provides Visual Studio Code (VSCode) as an open source free of charge. PowerShell Core is the new version of PowerShell, which is also available for Linux and macOS X. This new version can also be used with Visual Studio code. The Terminal tab in Visual Studio Code allows you to open the shells supported by VSCode. PowerShell is also available here. Using the key combination CTRL+P or CMD+P (macos X) a search bar appears in the upper area. Here you can install extensions for VSCode, for example the PowerShell. To do this, enter the command ext install powershell.
Using PowerShell Core in Linux
The PowerShell Core mentioned in the last section can also be used in Linux. To install the PowerShell Core on a Linux machine, you must first import the GPG Keys public repositories:
The Ubuntu repository is then registered by Microsoft and an update is performed:
PowerShell Core is imported from Microsofts Ubuntu repository.
PowerShell is then installed and can be started right away:
After the installation the PowerShell is available and you can work with the shell, also for creating scripts.
Convert your own PowerShell scripts
On the basis of the tools and operating systems, as well as the procedures in this article and the first part of the article, you can also create your own scripts. In addition to the cmdlets available for creating scripts, PowerShell also offers advanced capabilities. For example, you use the Start-Sleep cmdlet to stop Windows PowerShell activities. The Start-Sleep -s 10 command stops the script for ten seconds. Start-Sleep -m 10000 uses milliseconds. If you use the pipeline operator | Out-Printer to pass the output of cmdlets to the Out-Printer cmdlet, the PowerShell prints the output to the default printer.
You can also specify the printer in quotation marks and the label in the printer controller. You can use the Write-Warning cmdlet to display your own warnings in the PowerShell. Write-Host writes output to the PowerShell Console/Host if there is one. These two commands are often found in scripts that you can download from the PowerShell Gallery. You configure the colors for the output with -ForeGroundColor and -BackGroundColor.
Working with Variables
It is also interesting that you can also define variables within the shell. You can use these variables within a script. For example, if you want to store the current date as variable $today, you can enter the command $today = Get-Date in the shell. Todays date is then stored as variable $today. If you next enter $today in the shell, the current date will be displayed.
The command Get-Date -Displayhint Date only displays the date, Get-Date -Displayhint Time only the time. You can determine what type of object a particular cmdlet gets by passing the results of the Get command to the Get-Member command using a pipeline operator (|). This allows you to use the Get-Service | Get-Member command to send retrieved objects to Get-Member.
This command displays information about the .NET object that a command returns. This information includes the type, properties, and methods of the object. For example, to display all the properties of a service object, type Get-Service | Get-Member -MemberType *property.
Copying, deleting, and managing files and objects
You use the Copy-Item cmdlet to copy files or folders to scripts. You can also copy registry keys, certificates, and more. For example, the Copy-Item C:\\Scriptstest.txt C:\\Test command copies the test.txt file.
The Copy-Item C:\\Scripts* C:\\Test command copies all files in the corresponding source folder to the destination folder. The Copy-Item C:\\Scripts C:\\Test -Recurse command creates a copy of the C:\\Scripts folder in the C:\\Test folder. Without the -Recurse option, a Scripts folder is created in C:\\Test, but no files and folders are copied. Besides the complete command you can also work with the abbreviations cpi, cp or copy.
The Move-Item cmdlet moves objects: Move-Item C:\\Scriptstest.zip c:\\test. You can work with placeholders here as well, just like when copying. By default, Move-Item does not overwrite existing files in the target folder. The -Force parameter overwrites existing target files or folders: Move-Item C:\\Scriptstest.zip C:\\Test -Force. The Move-Item C:\\Scriptstest.log C:\\Testad.log command moves and renames files at the same time.
Besides Move-Item you can also work with mi, mv or move. You use the New-Item cmdlet to create new files or folders. You use the New-Item C:\\TempPowerShell -Type Directory command to create a new empty folder named PowerShell in the C:\\Temp folder.
To create a new file, use the same syntax, but type File: New-Item C:\\Scriptscript.txt -Type File. Use the New-Item C:\\Scriptsskript.txt -Type File -Force command to replace an existing file with a new empty file. Use the New-Item C:\\Scriptsskript.txt -Type File -Force -Value Text command to create a new file with the specified text as its contents. You can also use ni instead of New-Item.
You use the Add-Content cmdlet to append data to a text file: Add-Content C:\\Scriptstest.txt Text. By default, Add-Content inserts the new value after the last character in the text file.
Replace the contents of a file with Set-Content. The Clear-Content cmdlet deletes the contents of a file. After it runs, the file still exists, but it has no content. You can also use wildcard characters here: Clear-Content C:\\Test*. In addition to text files, the cmdlet also supports Excel tables, Word documents, and other files. You can also use clc instead of Clear-Content. The Remove-Item cmdlet deletes objects: Remove-Item C:\\Scriptstest.txt.
The * wildcard character deletes objects in a specified folder: Remove-Item C:\\Scripts*. The Remove-Item C:\\Scripts* Recurse command does not need to confirm the deletion. The Remove-Item C:\\Scripts* -Exclude *.doc command deletes all files except those that you excluded with -Exclude. Remove-Item C:\\Scripts* -Include .xls,.doc deletes only the files behind -Include. You can also use both options together, for example: Remove-Item C:\\Scripts* -Include *.txt -Exclude *test*.
Here, PowerShell deletes all text files in the folder except files with the string test in the filename. The -Whatif parameter does not remove anything, but returns what would happen: Remove-Item C:\\windows*.exe -Whatif.
Instead of Remove-Item you can also use ri, rd, erase, rm, rmdir or del. Rename existing objects with the Rename-Item cmdlet: Rename-Item C:\\Scriptstest.txt new.txt. The rni and ren commands also lead to the target.
Stack up your PowerShell script collection!
Go to our GitHub repository and check out our free collection of more than 1000 ready-to-use PowerShell-Scripts for O36, Active Directory, Exchange, VMware and many more. ActionPacks free PowerShell script collections