.svg)
.svg)

The virtualization technology Microsoft Hyper-V can be managed with different tools. Microsoft itself offers numerous options for performing all relevant tasks for managing Hyper-V and controlling VMs.
Managing Hyper-V does not always require complex tools such as System Center Virtual Machine Manager, PowerShell offers numerous possibilities without the need for additional tools.
Of course, the Hyper-V Manager is available as a standard tool, and the new Windows Admin Center also offers numerous functions. In the following, we show 12 interesting tips for controlling Hyper-V with the focus on PowerShell.
Installing Hyper-V from PowerShell and display cmdlets
Use the Install-WindowsFeature Hyper-V cmdlet to install the Hyper-V server role, and the -IncludeManagementTools parameter to install the additional management tools that are required.
These include the PowerShell module and Hyper-V Manager. If the server is to restart automatically, the parameter -restart is added.
Installing Hyper-V management tools
The management tools, without the Hyper-V server role, are installed with the Install-WindowsFeature Hyper-V-Tools command.
Display all available cmdlets
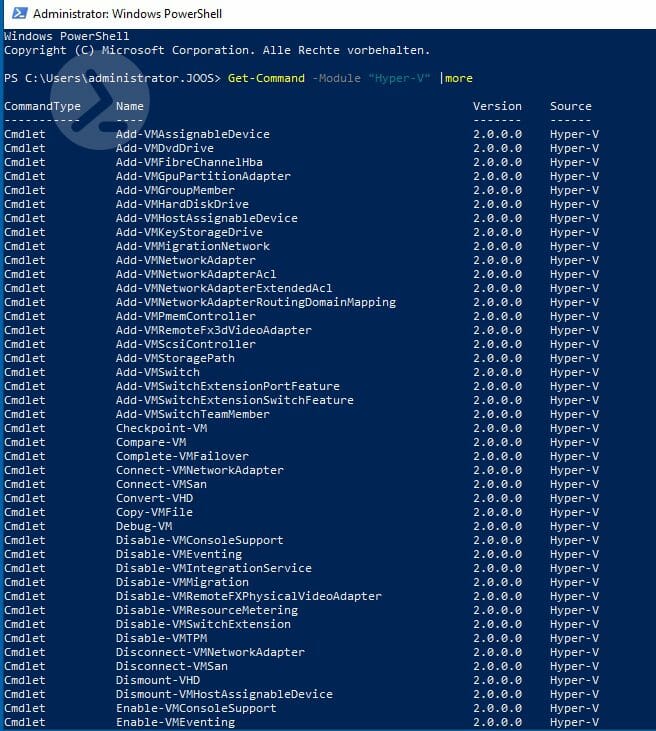
To display a list of all available cmdlets,use the Get-Command cmdlet with the -Module Hyper-V parameter. The output of this command is shown in Figure 1.Figure 1: PowerShell provides many cmdlets for managing Hyper-V.
Use PowerShell Direct
Windows Server 2019 enables direct access to a virtual operating system of a virtual machine from a PowerShell session on the host. This feature is called PowerShell Direct. It involves opening a session for the VM in the PowerShell with the following command:
Enter-PSSession -VMName
Run cmdlets from the host on VMs
There are also cmdlets that enable you to run PowerShell cmdlets directly on a VM without opening a session first:
Invoke-Command -VMName -ScriptBlock { Commands }
Copy files from host to VMs
Use the following commands to copy files from the Hyper-V host to VMs via PowerShell Direct
$PSSession = New-PSSession -VMName -Credential (Get-Credential)Copy-Item -ToSession $PSSession -Path C:\data.bar -Destination C:\
Managing Virtual Machines and Virtual Switches with Windows Admin Center
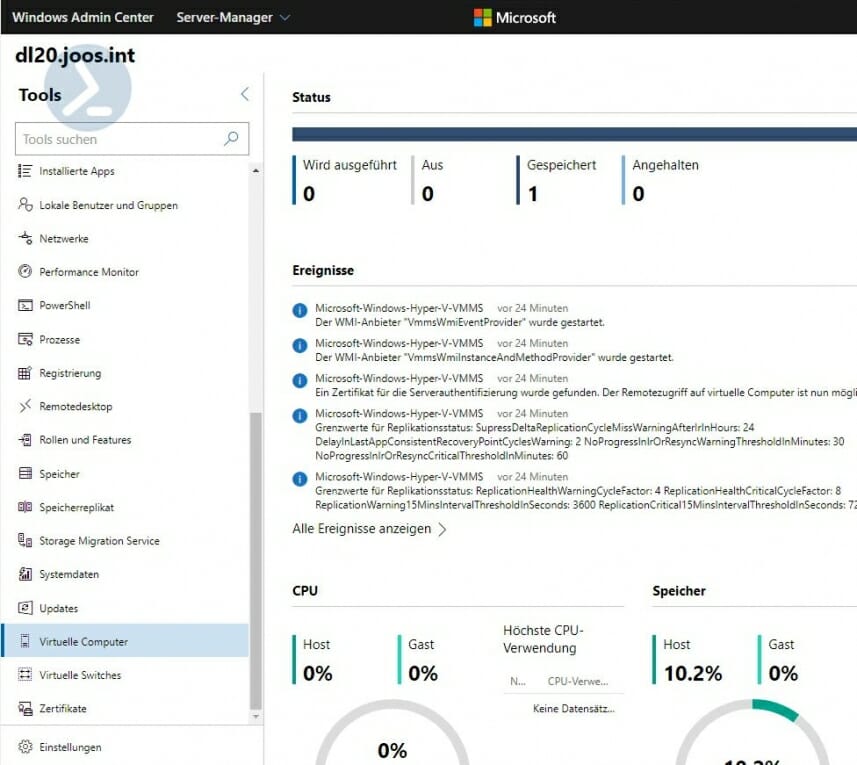
If you use the Windows Admin Center to access a server on which Hyper-V is already installed, you will find the two menu items Virtual Computers and Virtual Switches in the menu on the left side (see Figure 2).
This allows you to manage the VMs and virtual switches on Hyper-V hosts through your web browser. You can additonaly create and edit virtual servers. You can also control VMs in this way, as well as view the console from your web browser.
Figure 2: The Windows Admin Center can manage virtual machines and virtual switches on Hyper-V hosts.
Working with PowerShell in Windows Admin Center
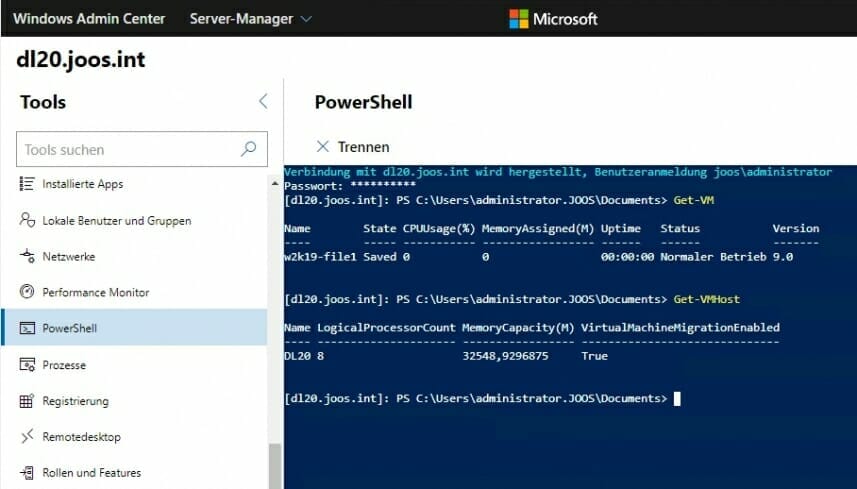
In addition, a PowerShell session can be opened on the server using the PowerShell menu item in the Windows Admin Center (see Figure 3).
Figure 3: The PowerShell can also be used in the Windows Admin Center to control Hyper-V
Adjusting Hyper-V settings in the Windows Admin Center
Under Settings, Hyper-V settings of the host can be adjusted, just like in the Hyper-V Manager. All this works in one session with the Windows Admin Center in your web browser.
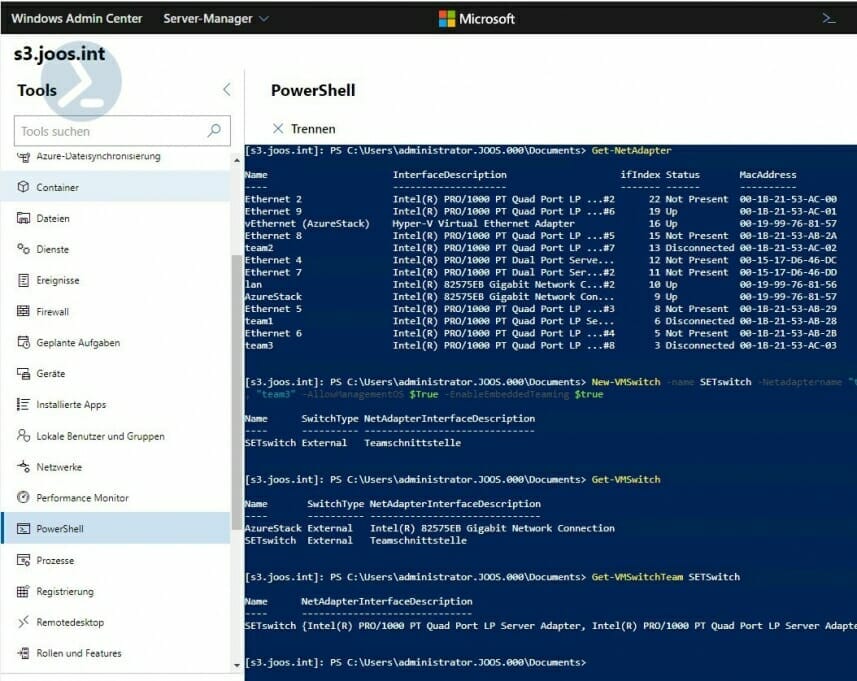
Enable Switch Embedded Teaming
The following command creates a virtual switch based on a network team called SETSwitch consisting of three network adapters:
New-VMSwitch -name SETswitch -Netadaptername team1, team2, team3 -AllowManagementOS $True -EnableEmbeddedTeaming $true
Displaying the network adapters for connecting to a virtual switch
To see all available adapters, use the Get-NetAdapter cmdlet.
Get-NetAdapter
 [[-Name] <string[]>]
 [-IncludeHidden]
 [-Physical]
 [-CimSession <cimsession[]>]
 [-ThrottleLimit ]
 [-AsJob] []</cimsession[]></string[]>
Viewing Virtual Switches Information in PowerShell
PowerShell uses the Get-VMSwitch cmdlet to display information about the virtual network switch.
Get-VMSwitch
 [[-Name] ]
 [[-ResourcePoolName] <string[]>]
 [-SwitchType <vmswitchtype[]>]
 [-CimSession <cimsession[]>]
 [-ComputerName <string[]>]
 [-Credential <pscredential[]>]
 []</pscredential[]></string[]></cimsession[]></vmswitchtype[]></string[]>
For more detailed information about the team, use the Get-VMSwitchTeam cmdlet.
To delete such switches, use the Remove-VMSwitch cmdlet.
Figure 4: Creating and managing network teams for Hyper-V using PowerShell in the Windows Admin Center
Related links
- ScriptRunner ActionPacks will help you automate tasks
- Try out ScriptRunner here
- ScriptRunner: Book a demo with our product experts