.svg)
.svg)

Surely you are familiar with the following scenario: Monitoring and the resulting alerting has "evolved historically" in the past: different monitoring tools are used for the different areas.But they have one thing in common: all alerts are sent by mail.
This ends up accumulating heaps of alerting messages from the various monitoring systems and scripts, in addition to appointment invitations, reconciliations and the photos of the last team event.
However, since the infrastructure is in constant flux and the manual maintenance effort for these alerts in the monitoring systems is growing at the same time, there are always one or two colleagues who forget to adjust the alert settings to the new requirements.
One often hears statements such as "Oh, this alert is not so important, it comes every other Sunday - just ignore it". The obvious solution is to create a separate folder in your mailbox, into which all alerts are automatically moved by Outlook rules and thus disappear into nirvana.
Granted: the scenario described here is quite close to the worst case of an alerting implementation. Nevertheless, it takes place in this or a similar way in many companies
This type of alerting is no longer appropriate given the increasing demands on the response time of an operations department and the rapid dynamics of IT infrastructure. The fact alone that communication about the alert between admins usually does not take place via mail, but now mostly via Teams (or another messenger), casts doubt on whether mails are the right medium for notification.
What are Webhooks?
So-called webhooks offer the possibility to send alerts or other notifications to a Microsoft Teams channel. Here you can create a separate Teams channel for monitoring for each department. The head of department has an overview of all notifications without his inbox filling up.
You can decide which areas are relevant to you and configure them to receive a notification when an incident occurs. Alerts and notifications can be commented directly, so there is no need for a media break in the collaboration between admins anymore. In this article, you'll learn how to create teams alerts like this with just a little PowerShell code:

Note: Webhooks are obviously also used outside of teams. All messengers now support webhooks and can be handled in a similar way (possibly with minor deviations in the configuration).
Before we get into the configuration of such a webhook, a few words about webhooks in general: An application can offer so-called incoming (or outgoing) webhooks. To do this, it provides a unique URL that waits to receive web requests in a defined format - comparable to an API. Applications and servers can thus exchange messages with very little configuration effort, which initially offers huge possibilities. In this article we focus on the possibility of monitoring alerting.
Creating Teams Webhooks With PowerShell
So now let's take a look at a specific example of PowerShell-initiated WebHooks. There is a wide range to choose from:
- When a hard disk on a server has only 10% capacity left
- When a server is no longer responding
- When the capacity of a OneDrive account is almost full, and it needs to be upgraded
- When M365 licenses in the organization will be maxed out in the near future
- and many more
Let's see how to use Teams webhooks to send notifications when a user account is locked in Active Directory. This way you can react in time and notice the lockout of the user even before the user's programs request a new login.
The approach is divided into two parts: the configuration in Teams and in the PowerShell script. PowerShell serves in most scenarios as a "glue" which links the different applications.
To explain: the Active Directory does not provide by itself the possibility to send webhooks as soon as a user is locked - this job will be done by PowerShell.
Configuring Microsoft Teams
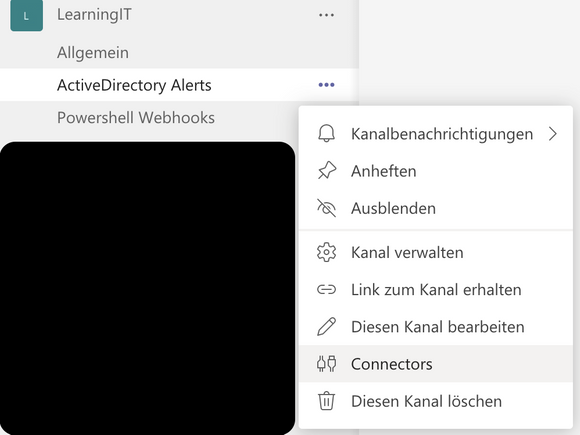
To enable webhooks, it is necessary to define a channel of a team to which they should be sent. Then you can open the connectors of the channel by right-clicking on it:
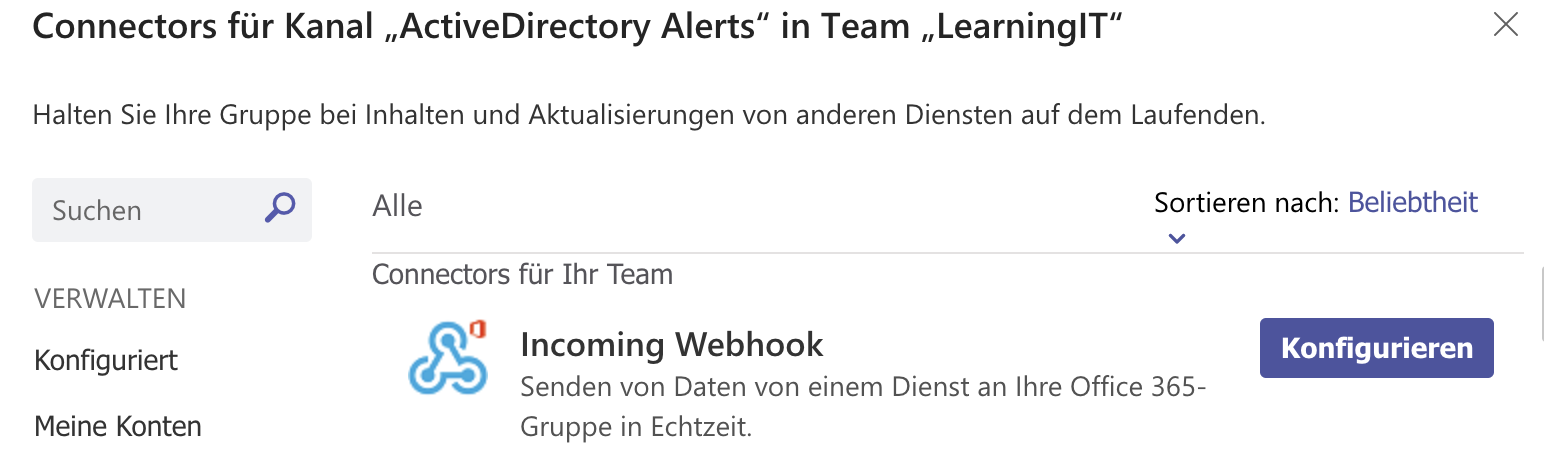
The interface setup can then be launched via click on "Configure" in the "incoming Webhook" panel:
After assigning a suitable name and optionally uploading an icon, click "Create" and you will receive the URL, through which we can send the web requests in the PowerShell script:

This URL must be kept safe, as it is of course public. An attacker could use this URL to send messages to your Teams channel - and logically you should avoid that!
After we have copied the URL we can now start with the PowerShell script.
PowerShell Script
In order to send webhooks to teams, the so-called JSON format is used. If you don't work with JSON on a regular basis, you will probably find the creation of a JSON file a bit fiddly.
The ScriptRunner software platform provides a function for sending webhooks to teams, which spares you from creating JSON. We'll take a closer look at this feature in the next article in this series. In this introduction, I want to show you the basics despite the possible alternatives. You can use the following schema for your JSON:
We use a hashtable, which we fill with the message content and then convert to JSON. PowerShell makes this task pretty easy for us.
Then, using the splatting method, a parameter list is created, to which you have to add the corresponding URL of your webhook configuration. We can then test directly whether the basic communication works. If the communication is successful, PowerShell returns a "1" and the message appears in our Teams Channel:

Great! You have now sent your first webhook to Teams. But now I promised you to provide a script that will notify you via Teams when a user is locked in AD. To do this, of course, we need a procedure that detects when a user has been locked out.
Fortunately the Windows EventLog creates an entry with EventID 4740 as soon as a user is created. We can use such an event as a trigger to start our script. This works via the Windows Task Scheduler, but much more convenient via the ScriptRunner interface.
We have now accomplished that the message "My first alert" is sent as soon as a user is locked - this is not very useful yet. Of course, we still have to adapt our script. For this we need a functionality to read the locked user and add this information to the message:
We now receive the following message in teams with this:
Conclusion
Webhooks are a state-of-the-art approach to alert management. The advantages clearly outshine mail alerts, even though they can of course have their advantages.
The PowerShell takes over the role of the mediator for applications that do not have a direct option to send webhooks. I can only recommend the use of webhooks and wish you a lot of fun with the implementation!
In the next part (part 2, part 3) of this series, you'll learn how to write webhooks scripts even more easily using a function that ScriptRunner provides for free on GitHub.
Related links
- ScriptRunner ActionPacks will help you automate tasks
- Try out ScriptRunner here
- ScriptRunner: Book a demo with our product experts