.svg)
.svg)

Working with the PowerShell pipeline is efficient, do you want to learn more about the pipeline? In this blog post, Philip Lorenz delves deeper into the topic.
Introduction
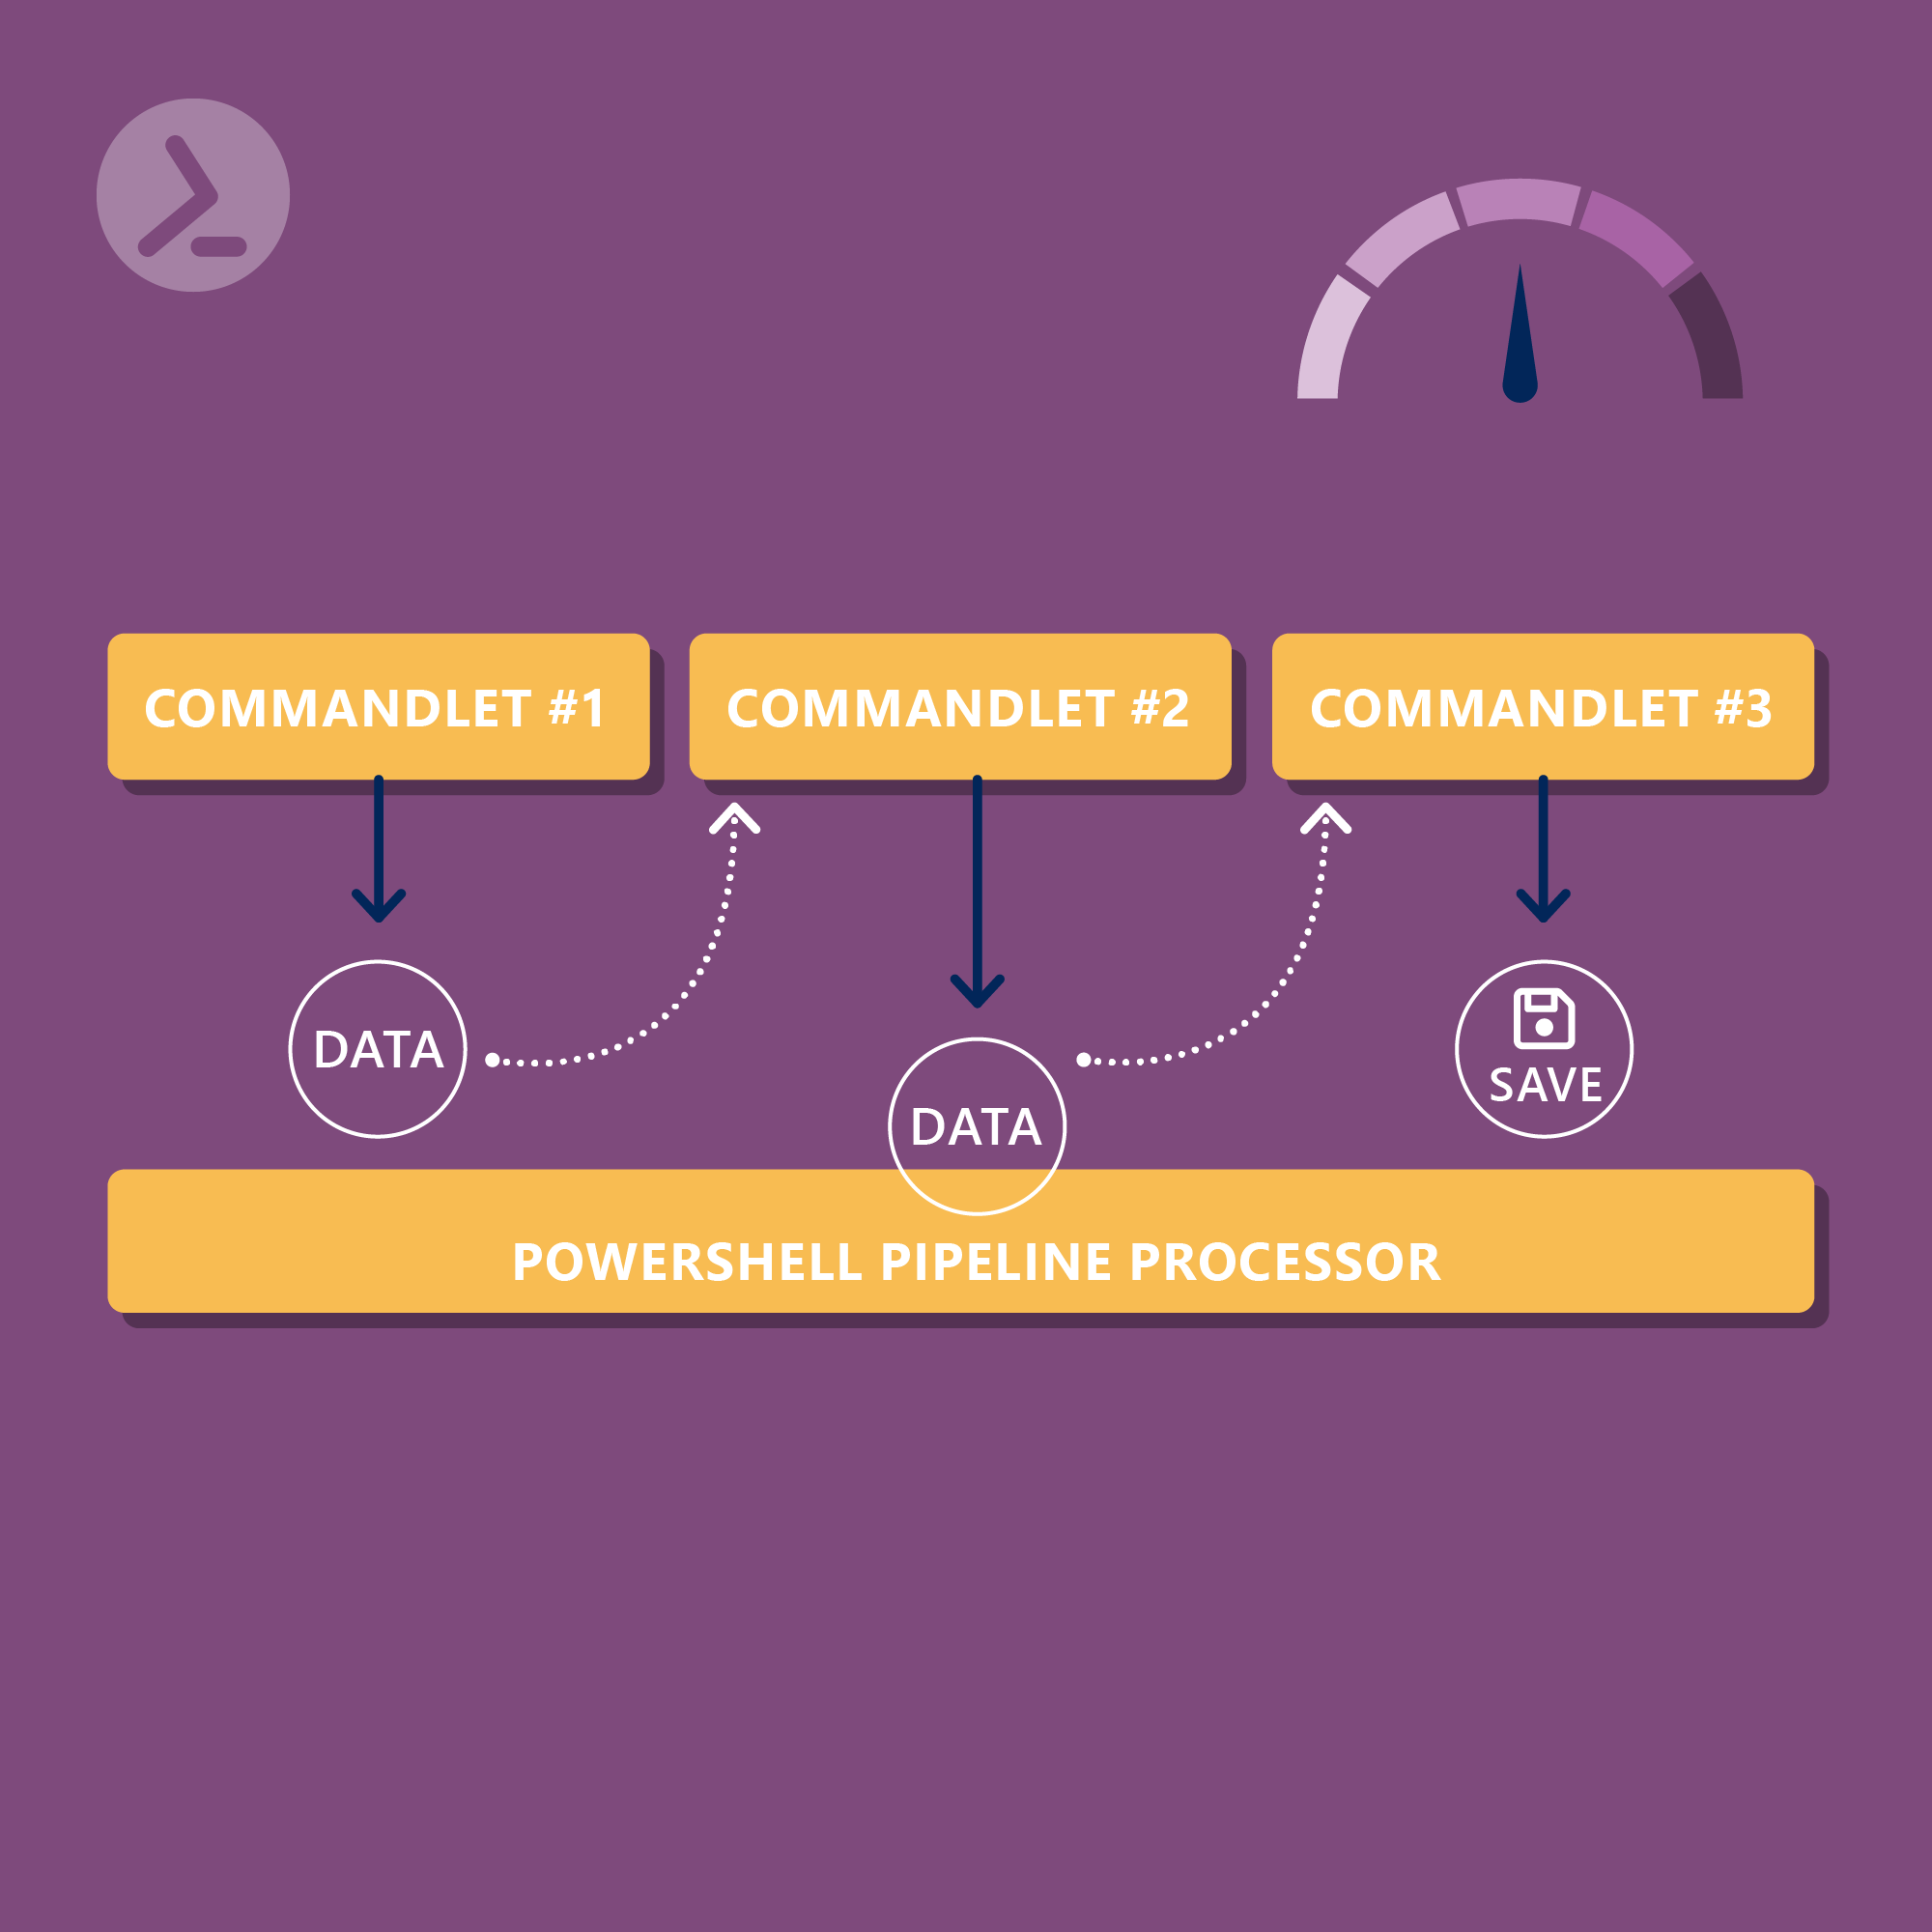
The pipeline is a central concept in PowerShell that allows the passing of output from one function or cmdlet as input to another. This creates a flexible and efficient method of processing data by allowing individual, well-defined tasks to be chained together. The "one at a time" principle makes it possible to process large amounts of data in a resource-efficient manner. In the article "Working efficiently with the PowerShell pipeline: A guide for administrators" I have already shown you how you can use the pipeline to chain existing cmdlets. In this blog post, I'll show you how to make your own functions pipeline-ready!
Integrating pipeline support into your own functions is not only good practice, but also extends the functionality and reusability of the code. Providing pipeline support in your own functions requires an understanding of pipeline mechanisms and the application of appropriate parameter and processing techniques. Throughout this article, we will explain these concepts from rudimentary to advanced functions and illustrate how you can maximize pipeline efficiency in your scripts.
Pipeline support basics
To use the pipeline in PowerShell effectively, it's important to understand some basics. Two key elements here are the filter keyword and the special variable $_. They play a crucial role when it comes to creating a simple function that provides pipeline support.
The filter keyword in PowerShell makes it possible to create a type of function that is specifically designed to process pipeline input. A filter takes input from the pipeline, processes it and returns something to the pipeline. The $_ variable represents the current object in the pipeline that is being processed. Here is a simple function that shows how the filter keyword and the $_ variable can be used:
In this example, we have created a filter called Convert-ToUpperCase. This filter takes text entries from the pipeline, and for each entry, the ToUpper method is called to convert the text to uppercase. There is also a direct output to the console. If you use this filter in a pipeline, each text entry is processed individually and forwarded to the output in capital letters:
The output would be:
Using filters and $_ is a simple and effective way to integrate pipeline support into your functions. It provides a clear and easy to understand way of taking objects from the pipeline, processing them and passing them on, which forms the basis for more complex functions and pipeline operations.
In the next section, we will look at Named Parameters and create an advanced function that goes beyond the scope of a simple function and provides more ways to interact with the pipeline.
Advanced functions with Named Parameters
While simple functions and filters are sufficient for many tasks, advanced functions in PowerShell allow for greater control and flexibility, especially when it comes to working with pipelines. One of the keys to this advanced functionality are Named Parameters.
Named Parameters
Named Parameters allow us to control the input of data in a structured and understandable way. Not only can you specify types for the input parameters, but you can also define default values and add validations.
Here is an example of an advanced function with Named Parameters:
In this Get-ModifiedFiles function, we have defined two Named Parameters: $Path and $Since. The parameter $Path is mandatory and accepts input from the pipeline, while $Since is optional. In the process block, we use Get-ChildItem to get all the files in the specified path and Where-Object to filter the files that were modified after the specified date.
Here is an exemplary call:
Output:
In this call, the current directory is passed to the Get-ModifiedFiles function as a simple string, and all files that have been modified in the last seven days are returned.
Named Parameters provide a clear and explicit way to control the function inputs and allow finer control over data processing within the function.
In the next chapter, we will look at structuring functions with Begin, Process, End and Clean blocks.
Structuring functions with Begin, Process, End and Clean blocks
Structuring functions with the Begin, Process, End blocks and the newly introduced Clean block in PowerShell 7.3 provides a robust method for processing pipeline data and cleaning up resources. These blocks make it possible to divide code into logical segments that are called at different times during the execution of the function.
- The Begin block is executed once at the start of the function and is suitable for initialization actions.
- The Process block is executed for each object that is passed through the pipeline and is the main location for data processing.
- The End block is executed once after all pipeline objects have been processed and is suitable for final actions.
The Clean block, introduced in PowerShell 7.3, provides a way to clean up resources that span the Begin, Process and End blocks. Semantically, it is similar to a Finally block and covers all other named blocks of a function. Resource cleanup is enforced in various scenarios, such as when the pipeline execution is completed normally, interrupted by a termination error, or stopped by Select-Object -First or terminated by CTRL+C or StopProcessing().
Here is an example that demonstrates the use of all blocks:
- The Begin creates a temporary directory that is used during processing.
- The Process block checks whether the passed path is a file, collects information about the file, updates the total size and stores file information in a temporary file.
- Der End block outputs the total size of all processed files.
- Der Clean block deletes the temporary directory after processing is complete to ensure that no unwanted data is left behind.
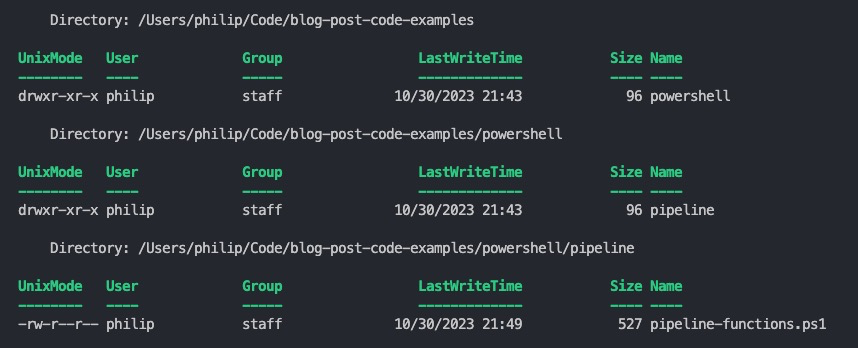
Execute the following code:
And get the following output:
By using Begin, Process, End and Clean blocks, the function is structured and enables efficient processing and cleanup.
Implementation of ByPropertyName in own functions
So far, we have dealt with passing values ByValue to functions. However, PowerShell also offers the option of passing ByPropertyName values. This enables a more flexible and intuitive interaction with functions.
ByPropertyName vs. ByValue
- ByValue: Here, the value of an argument is passed directly to the corresponding parameter of the function. This is straightforward, but can lead to confusion in situations where the parameter relationships are not clear.
- ByPropertyName: With this method, the value of an argument is passed based on the name of the parameter. This can be particularly useful if the function has many parameters or if the function is used in a pipeline where the output of the previous cmdlet is used as input for the next cmdlet.
Here is an example to demonstrate the implementation of ByPropertyName:
The following is displayed in the console:
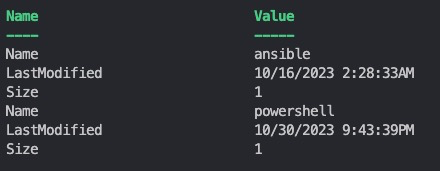
In the Get-FileDetail function, we have defined the parameter $FullName with the attribute ValueFromPipelineByPropertyName=$true. This allows the function to accept values from the pipeline that are assigned based on the name of the $FullName parameter. In the example call, the output of Get-ChildItem is forwarded to Get-FileDetail, where the FullName property of the output objects of Get-ChildItem is mapped to the $FileName parameter of Get-FileDetail.
By using ByPropertyName, functions can be used more intuitively and flexibly in pipelines, and the assignment of input values to functions becomes more transparent.
In the next paragraph, we will look at the $Input automatic variable, which provides another way of processing pipeline input, especially if the input is to be treated as a block rather than as individual items.
The $Input automatic variable
While many PowerShell developers are familiar with the $_ pipeline variable, $Input is less well known but provides valuable functionality in certain scenarios.
The $Input variable allows the entire pipeline input to be treated as an enumerator. This means that instead of processing each element of the pipeline in turn, you can access the entire input as a whole. This can be useful in scenarios where you want to treat the input as a block, e.g. when sorting or grouping data.
It is important to note that $Input is an enumerator and cannot be used directly as an array. To use $Input as a real array, you can include it in @().
Here is a simple example:
In this Soft-InputData function, we first collect all pipeline inputs in an array $dataArray and then sort this data. The result is a sorted list of numbers.
When to use $Input?
Using $Input is particularly useful when you want to perform multiple operations on the entire pipeline input without processing each value individually. However, it is important to understand the difference between $Input and $_ and choose the right variable for the scenario.
Conclusion
PowerShell pipelines are undoubtedly one of the most important features of PowerShell. Their ability to transfer data efficiently and seamlessly between different cmdlets and functions sets them apart from other scripting languages. For any IT professional looking to automate complex tasks and optimize workflows, they are an indispensable tool.
Unleash the full potential of PowerShell with our handy poster. Whether you're a beginner or a seasoned pro, this cheat sheet is designed to be your go-to resource for the most important and commonly used cmdlets.The poster is available for download and in paper form. Get your poster here!
Related links
- ScriptRunner ActionPacks will help you automate tasks
- Try out ScriptRunner here
- ScriptRunner: Book a demo with our product experts